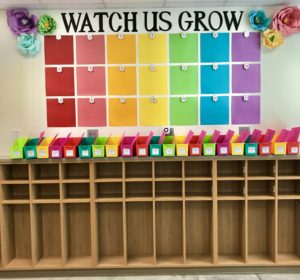
Going back to school means it’s time to reorganize and decorate the classroom! After, hours of work and help from my wonderful mom, my classroom is ready for all my new first graders. Take a look at my room for some helpful tips on how to get your classroom ready for the new year.
Work Wall
I created this last year in my classroom to show off my students work. I bought 21 pieces of 12×12 scrap paper from Hobby Lobby. I also purchased 1 inch thick painters tape to help space out the papers. I started from the bottom and worked my way up. I first measured out how wide the 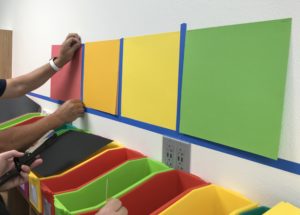 display would be. It turned out to be 90 inches wide and 38 inches tall. If you have a smaller wall you can use 1/2 inch painters tape or use 8.5×11 paper. After measuring how wide the display would be, I started on either side and worked my way to the center. After finishing the bottom row, place the painters tape above the paper to make space for the row above. If you are interested in adding paper flowers like I have, visit Jennifer’s blog, The Craft Patch. She has a very easy to follow, tutorial on how to make the paper flowers. They were quick and easy to make and they add so much to your wall. Once everything is hung, you are ready to display your students work!
 Word Wall
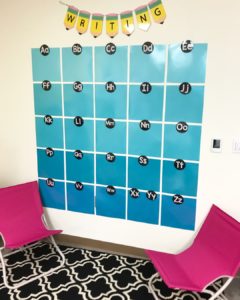
Based on how I decorated my word wall, I think you can guess my favorite color. Last year my word wall and I fought all the time because the words were always falling off the wall. This year I decided to totally change it. I bought 25 pieces of 12×12 blue scrapbook paper from Hobby Lobby. I chose 4 different colors to make an ombre look, but it’s up to you if you want to use different colors or all the same. I also decided to laminate my paper before hanging it up. I did this because my hope is to write sight words directly onto the paper using an expo marker. When hanging your papers, you will also need painters tape to help space out the squares. I used 1/2 inch painters tape, but 1 inch works as well. The painters tape is a life saver when spacing out the squares. First, we found the center of the wall
and aligned the middle square with the center of the wall. Next, we placed painters tape above the paper to keep the papers straight on the top row. We also 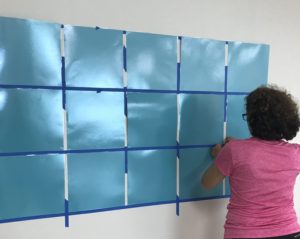 placed painters tape on the side of the paper to space out the papers. Your top row will be 62 inches across with spacing (that is with the 1/2 inch thick painters tape). Once you have placed the top row, you will need to place the painters tape at the bottom of the papers to space out your second row. From there, the rest of the rows were easy to place. You continue the pattern of placing painters tape on the sides of your paper and below it. When adding the laminated letters I wanted to add a 3D look so I hot glued the circle letters onto a small clothespin. I then clipped the clothespin onto the paper in the center. If you do not have clothespins, you can hot glue the laminated letters straight onto the papers. I am really looking forward to using this word wall this year.
Teacher’s Area
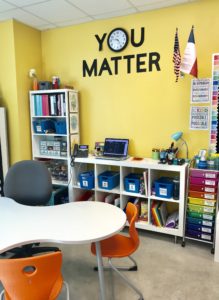 This year, I decided to get rid of my desk and purchased these cubbies instead. I use these cubbies to store small group supplies and some items I need. On the right, I use the colored drawers to organize my papers. You can find the labels for the drawers here.The adorable motivational posters are from Especially Education’s Kindness Kit. She has so many cute and bright posters to add to your classroom. If you are interested in adding a “You Matter” quote to your wall, you will need 8 pieces of 12×12 scrapbook paper. I used a Cricut to cut the letters and stapled them to the wall. If you are using black paper like I did, you will want to color your staples black with a sharpie to hide them. It’s a great message for all your students.
I hope everyone has a great year! 🙂


![Our FUN and FUNctional personalized stationery is the perfect go-to for expressing your gratitude, staying in touch and easy gifting for any occasion. Joy Creative Shop stationery features unique colors and clean, modern typography on lightly textured white cardstock. Product Highlights: -4.25 x 5.5 inches [A2] flat ca](https://i.pinimg.com/236x/27/4f/49/274f49c3872bd27b381c9b104bca6c0c.jpg)
ESPECTACULAR!!!!!
Thank you!
🙂